
Glad you loved it. If you consider floats for the Nieuport(I see your eyes rolling) then choose composites like Clamar specifically for non-certifieds. No rivets, no leaks, no pump outs.Originally Posted by bookmaker


Glad you loved it. If you consider floats for the Nieuport(I see your eyes rolling) then choose composites like Clamar specifically for non-certifieds. No rivets, no leaks, no pump outs.

Rose and I had a little time weekend before last to work on the Nieuport. I wanted to replace the drag/antidrag wires in the left lower wing as I was not satisfied with the tension. DONE. While I had it in the shop, I made and installed the leather cable separator. While I was at it, I made and installed them on all internal wing cable crossings.
Leather Separator:
The next project was to reinstall all the vertical fuselage members that I had removed to change the lower wing incidence. It turned out that I only had to remake one on each side. The remainder had the new holes far enough from the original, or in the same location, to reuse them. The only problem is the vertical member behind the front carry through tube could not be match drilled with the required 5/16" bit while in place. Lowering the carry through put it too close to the longeron the get a drill and bit in place. So, I determined I could use a 12" long 1/8" bit that is somewhat flexible to drill a pilot hole by letting the bit lay along side the longeron. The problem was there were already 5/16" holes in the front tube and carry through. I decided I could make a centering guide. I ordered a length of 5/16" OD 4130 tubing with just under 1/8"ID. I cut a piece to the length I needed and drilled it to 1/8".
Guide and bit:
Guide and bit in place. The goal is to drill the vertical member to the right of the carry through tube:
Drill position: (bad photo, sorry)
It worked great. I then removed the piece just drilled (held in with clecos) and opened the holes to 5/16". The pieces were all reinstalled and riveted in place and all that was required was a slight reaming to get the holes lined up for the bolts.
All back in place:
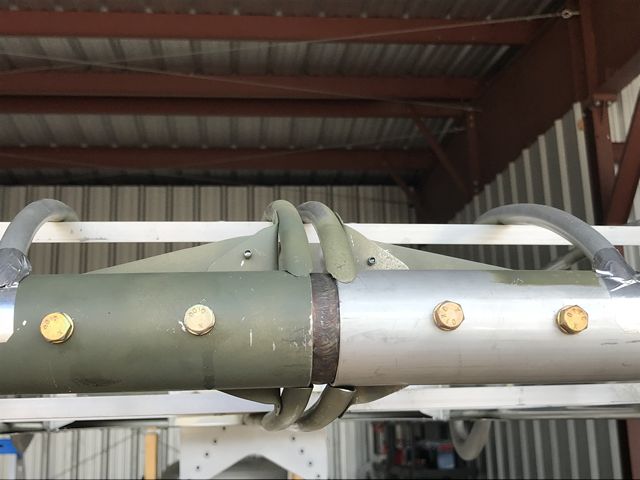
My other project was to fit the attachments for the rear landing cables to the rear cabane structure. As is usual, I varied from the plans to suit my tastes and mounted them to the upper outside of the struts. Since I did not want that kind of potential load puling out on the struts, I made a connector piece for the inside that connects the two sides transferring the load from side to side.
Rear landing cable attached:
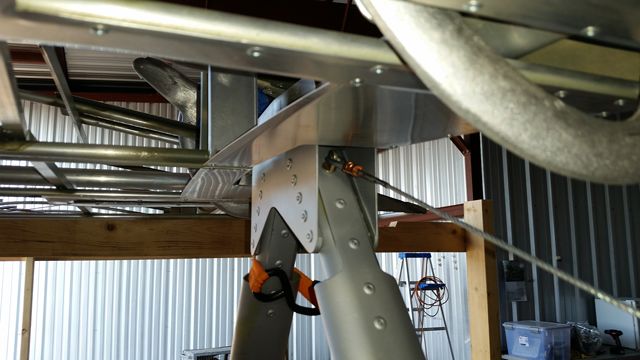
Connector:
The front cabanes were also shortened and the top end angle modified. All cabanes and carry through tubes are now back in place.
The next step is to align the wings then insert shims, etc to fix them in that location.
Dale
Last edited by bookmaker; 07-18-2018 at 02:20 PM.
Dale Cavin
Florida Panhandle
Current Project: Airdrome Aeroplanes Full Size Nieuport 17
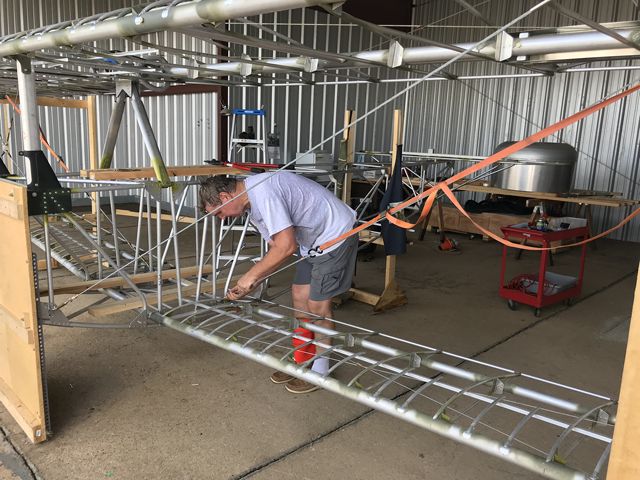
Rose and I spent yesterday afternoon working on the Nieupy. We spent quite some time drawing reference lines on the rough floor of the hangar then lined up the upper wing. When we were satisfied with that we drilled the holes through the forward cabanes for the mounting bolts top and bottom. Since we lowered the wing leading edge, the cross cables are too long so we got measurements to make new ones.
Finally we moved to the lower wings, aligned them and inserted the spacer washers on the front carry through bolts.
Doesn't sound like much, but several hours work in really hot and humid conditions.
Hopefully a little more work on it (and photos) today.
Dale Cavin
Florida Panhandle
Current Project: Airdrome Aeroplanes Full Size Nieuport 17
Yesterday, Rose and I went to the hangar and squared the wings and reattached the cabane cross cables, rear carry through bolts and drilled the lower wing rear spars at the connector to insert D pins to hole the wings in place.
Tonight we worked on the rudder to get it ready to cover. I need something covered to kick up the motivation level.
I added trim over the control horns for fabric attachment.
I added a 3/8" tube from the top bow to the lower rib to prevent the top from bowing in when covered.
Rubber grommet where the tube penetrates the rib
Rib drilled for fabric rivets.
Ready for anti chafe tape.
Dale
Dale Cavin
Florida Panhandle
Current Project: Airdrome Aeroplanes Full Size Nieuport 17
Rubber grommet? That's pretty sexy. Mine doesn't have that vertical tube, though - I guess because it's small than yours. Or did you add that?
Covering the tail first is a good plan. Every single covering task, especially covering around tight curves and tapes, is on that tail. Heck, figuring out that one must evenly iron both sides and getting a feel for it is invaluable.
The opinions and statements of this poster are largely based on facts and portray a possible version of the actual events.
I added it Frank. I knew if I didn't put something there, the top bow would pull down when shrinking the fabric.
Dale Cavin
Florida Panhandle
Current Project: Airdrome Aeroplanes Full Size Nieuport 17
It wouldn't.
On covering the Nieuport - going for "final shrink" is usually a bad idea...or, rather, should be taken with extreme caution.
For the tail feathers, go to the second heat temp and stop. It'll still be tight as can be, and the odds of having them warp is small.
The opinions and statements of this poster are largely based on facts and portray a possible version of the actual events.
Some movement on the Nieupy since the last posting. As usual, life has been getting in the way.
Rose and I modified my previously made pattern for the interplane V strut. I plan to make the final ones out of spruce rather than the aluminum tubes supplies in the kit. Two newer sets of pattern boards were made from this. Unfortunately, they will need to be modified due to the change in the next paragraph.
It was decided to modify the upper wing support to eliminate the washout that was built in based on initial comments from Robert Baslee. He subsequently indicated this is not necessary and he does not use it. I decided to eliminate it also (it was not built into the wing structure, just twisted on the supports) The modification to the support required cutting a notch to clear the metal fairing at the wing/aileron intersection. I can just be seen in this photo.
Next was to drill the holes and install the remaining 6 bolts at the upper wing center intersection front and rear. Drilling through the internal stainless steel connector tubes used up several bits.
Then we mounted the flying wires, set the lengths and swaged a turnbuckle on the lower ends. The upper ends have factory forks installed on the cables. Man, squeezing 16 times on the 3/16 cable swags was a real workout. (The landing wire cables were just sent to Aircraft Spruce for factory forks on one end of each of them)
Finally, the other evening, I taped up the rudder frame for covering. I hope to get it covered by this weekend.
Dale
Dale Cavin
Florida Panhandle
Current Project: Airdrome Aeroplanes Full Size Nieuport 17
I take it you got one of the mythical instruction books that Robert said come with kits?
On my plans it was hand written that there is zero washout on the top wing and 2.5 degrees on the bottom wing, accomplished by rigging.
Now, then, maybe Robert with 30+ years of building material can measure out a 2.5 degree washout on a upslope wing via rigging with any sort of accuracy, but that was beyond me, and I just ignored it. I just rigged it all as true and symmetrically as I could.
Power off stall - she mushes, then stalls straight forward. Power on stall - gentle break to the right, nothing spectacular. As long as the rigging is correct and the same for both sides, just about everything else is gravy. Certainly one would be shocked if they ran a laser down the top of the ribs on my wings...relatively consistent is a fair term; perfect would not.
The opinions and statements of this poster are largely based on facts and portray a possible version of the actual events.
The lower wing has 2.5 degrees of dihedral in a wing, not washout. I think you mixed up the terms. The top wing is flat end to end.
By the way, I just shook one of the containers of fabric adhesive. It is plenty liquid so should be OK. I'll cut out fabric for the rudder tomorrow after work.
Dale Cavin
Florida Panhandle
Current Project: Airdrome Aeroplanes Full Size Nieuport 17

 Reply With Quote
