-
08-04-2018, 05:31 PM
#151
Waiting on supplies. 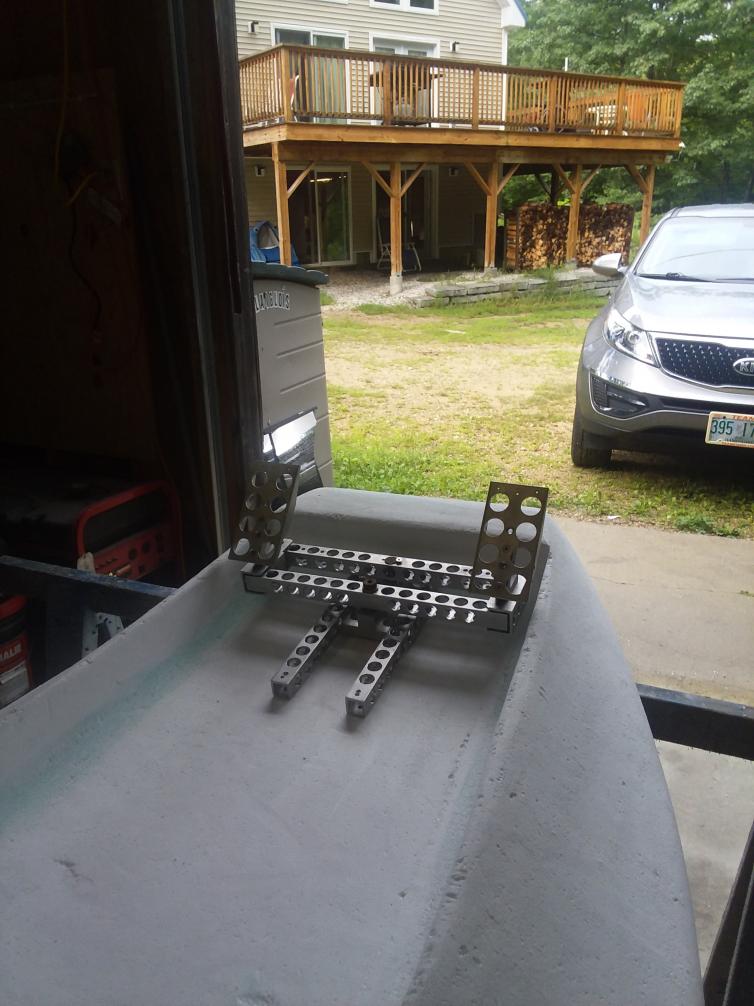 The latest stats I have the core down to 9 lbs 10 oz. and the ruder pedals to 4 lbs. 3 oz. after removing unnecessary metal tube and drilling weight reduction holes. I also cut the cockpit cavity deeper. I like my pedals and there is need for weight forward as long as I stay on track they will be part of the new setup.
-
08-20-2018, 01:25 PM
#152

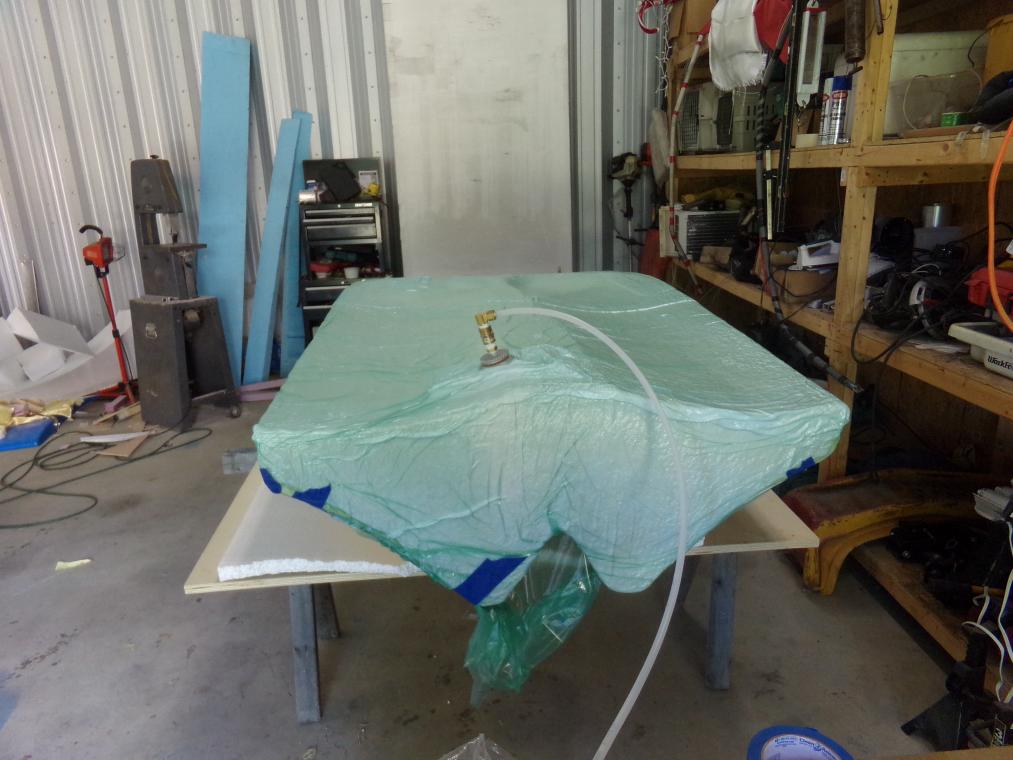
After acquiring needed supplies. I did a vacuum bag peel ply using Kevlar . I was not set up for vacuum bagging so I had to get innovative. I had sat in on a carbon fiber forum .I Took note of the fine points. Since I was not about to go out and buy a vacuum pump as recommended [ diaphragm ] type . I used the suggested cheap path . A small venturi device and my compressor a 6.0 scfm at 90 psi system. The veturi device are sold by many sources. From $190.00 down to $32. If you know what you are looking at. The little black block in the pictures shown of said device is very little indeed about 1/2 inch thick 1 X 1 1/2 inch .Its small but very powerful. those shown have a muffler attached . If you want to use a venturi do this just type AIR -VAC you will understand after looking around a bit what I mean. I went further , but by the time I was through buying many brass fittings for my multi device . I chose to run a dual system with gate valves. Using not just the venturi but also the intake of my compressor. I had spent over $150 bucks on bits and pieces. But it worked. Even better than I could hope for. The intake side of the compressor is a high volume reduction while the little venturi is strong at 27.5 it is low volume and very slow for a large bag. with both turned on it took only a minute or 3 to suck it down tight. Baring the many leaks from folds after enough tape. I did the layup in 4 stages the socket, the cabin, the forward deck and last the entire bottom and transom
Each the resin to foam the kevlar. then work on the polyester fabric. next the polyester fiber fill [sponge] this sponges up the excess. I did by one of the best vacuum bagging material its very elastic and has good memory also reusable the tape pulls of the resin and other stick points. I also used a double sided bagging tape . When I needed direct to a former layup .I had found that applying the tape to the foam caused to much damage. In the beginning I Had purchased a $44. sheet of poplar ply 4X8 sheet for a vacuum table. This saved me alot of expensive double tape I just used blue painters tape, taping the bag directly to the wood. 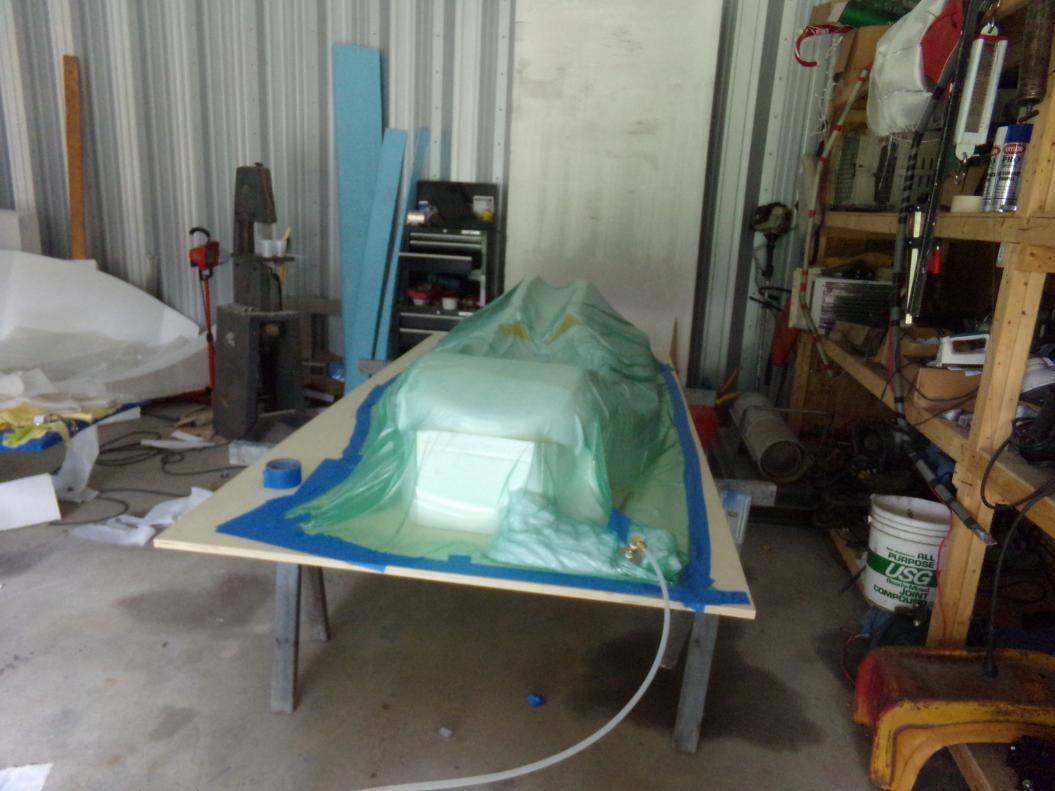
-
08-20-2018, 01:32 PM
#153
-
08-20-2018, 04:27 PM
#154
Are there any structural features inside the foam or does the Kevlar provide all the strength needed ?
Bob
-
08-21-2018, 07:53 AM
#155
Hi Bob
No there is no additional structures . The form shape contours and cockpit galley walls are about all there is. Better than a flat stress skin . With kevlar I certainly hope its enough . The 281 bi directional plain weave is strong stuff. I expect I will be adding a 3"wide perimeter layer on the top to bottom overlay. I think that will be all.
-
08-21-2018, 02:39 PM
#156
I've never done any composite stuff so that's the reason I was asking. I would like to try it someday and getting feed back from those who have done it, (like you) is a big help. I'll be lurking around.
Thanks,
Bob
-
08-22-2018, 07:46 AM
#157
-
08-29-2018, 04:37 PM
#158
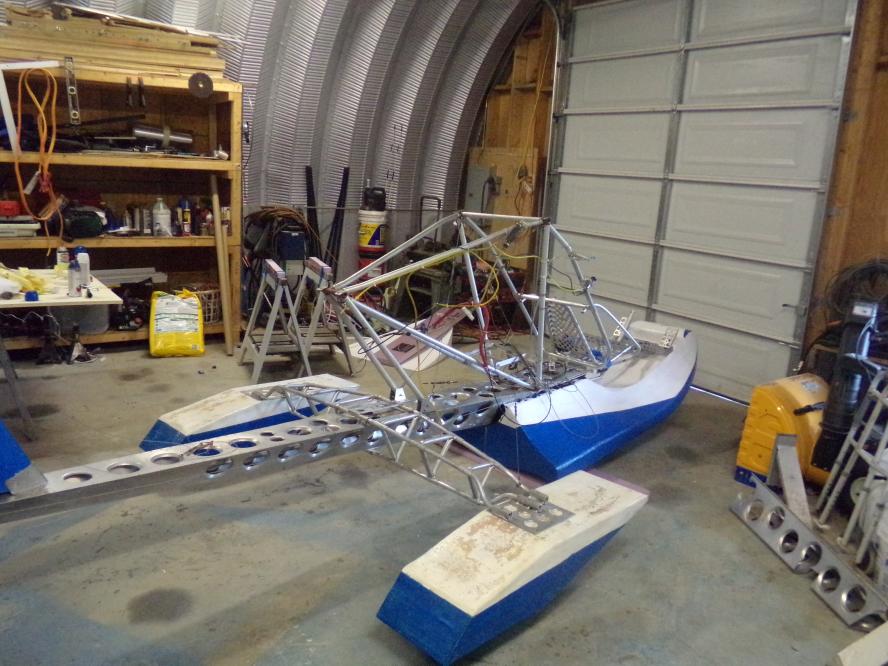
 Its back on the new total weight is 296.5 lbs
That includes all original parts and hardware. That weight may go up a bit or down the electric wire cabling will shorten and something needs to be made for instruments.
I moved the seat forward to offset the reduction of hull weight. A full assemble inside the garage and rerun the calculations to see.
The new hull weight after painting was only 19 lbs
The size of that in displacement is 9 cu ft the foam core was 9.8Lbs before all the resin and kevlar.
Anyone thinking of adding floats to an 103 legal UL might consider a foam construction method it is stronger than you may think and far lighter per pound than any other construction and totally unsinkable if perforated
Adding a tube skeleton would make for a secure attachment point or some thing of similar nature using a bonding as I used.
Example If I were to redo the rear floats I may opt for a pocket bond and eliminate the internal tube .and add only an wear strip for abrasion. further reducing my total weight by up to 10 lbs aft
Last edited by Norman Langlois; 08-29-2018 at 04:49 PM.
-
09-08-2018, 03:54 PM
#159
I have it ready to go. I am at the last minute . I may yet make the lake before I leave for Fl., no I am not taking it with me.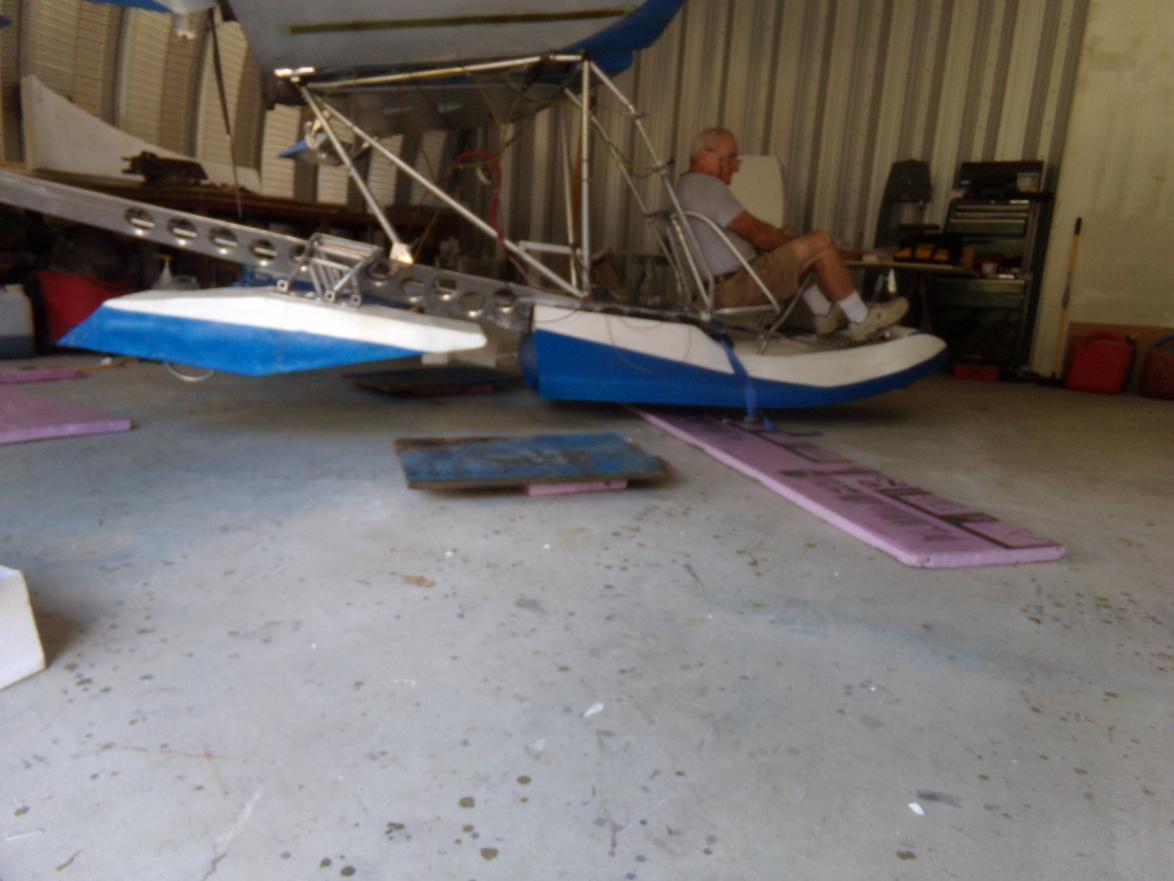
Here I have it hanging from the ceiling ,its not touching the floor.
That point is 17 inches back from the LE.
In the last post I made claim of weight. Im not sure where it ended up, but it is close to the limit.
I plan next year to redo the rear floats .
Last edited by Norman Langlois; 09-08-2018 at 05:08 PM.
-
09-08-2018, 05:15 PM
#160
Some of the latest pictures. setting it up for the transport. 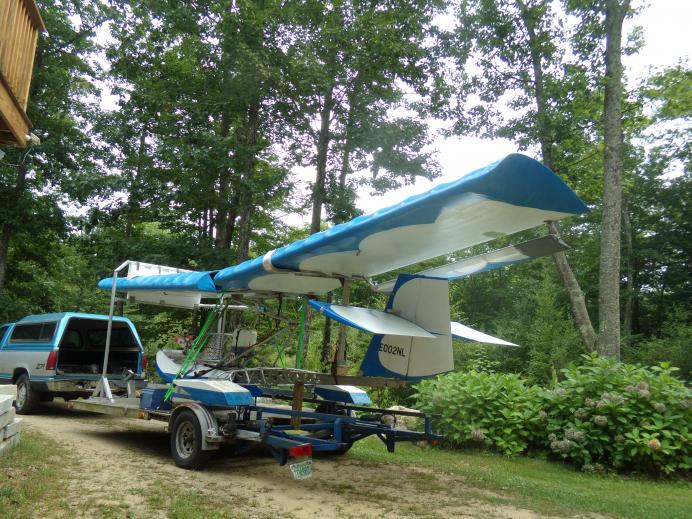
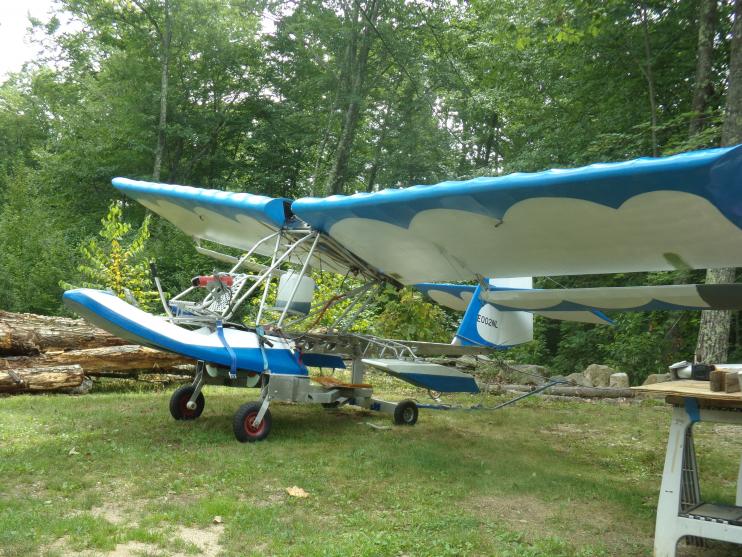 It is ready and I do hope to get it to the lake.
 Posting Permissions
- You may not post new threads
- You may not post replies
- You may not post attachments
- You may not edit your posts
-
Forum Rules


 Reply With Quote