Page 1 of 3 123 LastLast
Results 1 to 10 of 83

Thread: Chrome Moly 4130 Motor Mounts - Prefab Parts?

Hybrid View

Previous Post Previous Post   Next Post Next Post
  1. #1
    TansAir's Avatar
    Join Date
    Feb 2012
    Location
    Arlingon Heights, IL
    Posts
    11

    Rolls Eyes Chrome Moly 4130 Motor Mounts - Prefab Parts?

    Hello all!!

    I am currently building custom motor mounts for my 503 on custom UL. It has been been pretty straight forward so far, but I am stuck on the fabrication of some support uprights. I am using chrome moly 4130 tubes, and wish to join them up top by using same method common to that of most firewall mounts. I have attached picture to show the method I would like to reproduce for my application.

    Name:  engine-mount-fw-example2b.jpg
Views: 2089
Size:  64.1 KB

    I will likely use AN4 or AN5 bolts, and need to fabricate the bushing piece with round foot plate (sorry if my terminology is not accurate, but you get the idea). I was wondering if there is source for these small assemblies already produced? Then I can just attach and TIG my tubes and save some time. I checked leading edge, aircraft spruce, cannot find anything. They seem so common I figured there must be a supplier for them ... if anybody knows source please let me know.

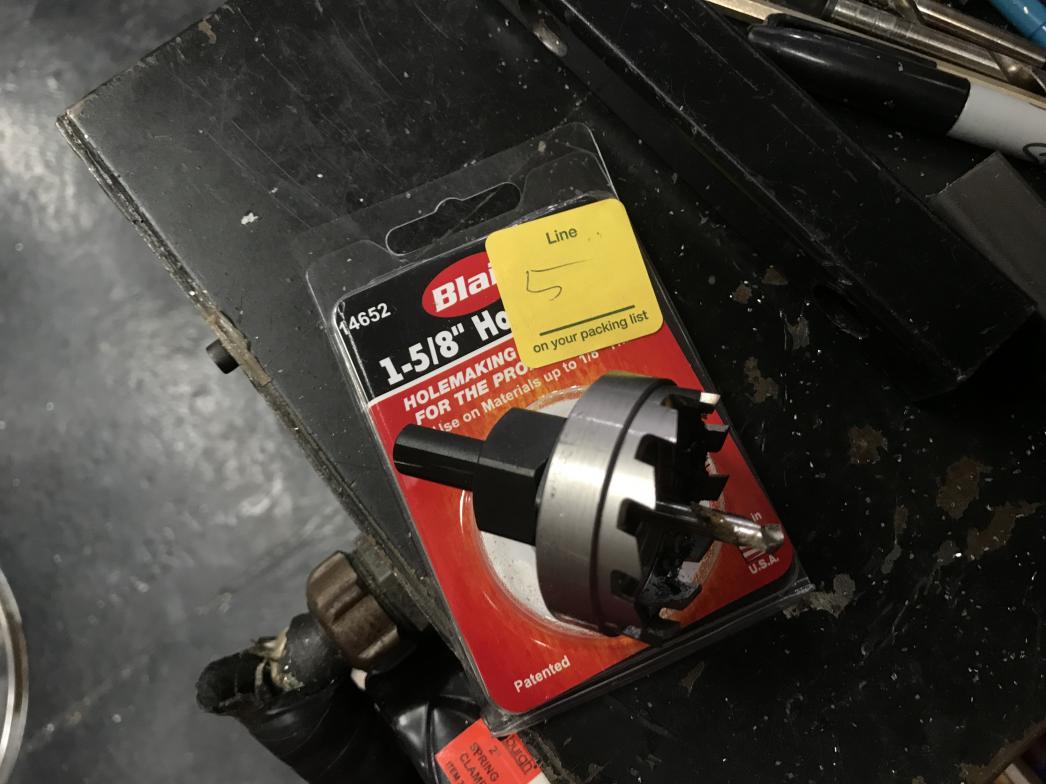
    Alternately, I have all the machine tools to make them, I find 4130 at mcmaster and can make the bushing from solid 4130. Their stndard tubing does not seem to have thick enough wall for this so I expect I would need to make from solid rod and bore out center on lath, no biggie. The round foot plate got me scratching my head tho, I cannot find discs or washers from 4130 (and of course I want to stay with same metals for TIG welding). I cannot image slicing such thin discs (from round bar) on the band saw for them, and likewise cannot image cutting circles from sheet metal either. Maybe a small hole saw and cut from sheet? There must be a better way or source for them??

    Thanks in advance for any help or guidance on this one Kevin
    Kevin Tansor
    Arlington Heights, IL
    Private Pilot, ASEL.
    Alon A2 Aircoupe, C90
    Air Command CLT, EA81.
    PRA Chapter 18, KIGQ.
    Latest Vid's - The Screamin' Ostrich Gyroplane:
    YouTube - TansAir Flying Channel
    www.alphasuite.com

  2. #2
    TansAir's Avatar
    Join Date
    Feb 2012
    Location
    Arlingon Heights, IL
    Posts
    11
    ... FYI: I am using ER70S-2 filler when I TIG the 4130 tubes, maybe there is compatible steel I can join with same filler, and that might open the door to other available already made parts (the bushings and maybe fender washers) that can be used for this? So that makes another question, are those small assemblies commonly made from "other than chrome moly"? Thanks!! Kevin
    Kevin Tansor
    Arlington Heights, IL
    Private Pilot, ASEL.
    Alon A2 Aircoupe, C90
    Air Command CLT, EA81.
    PRA Chapter 18, KIGQ.
    Latest Vid's - The Screamin' Ostrich Gyroplane:
    YouTube - TansAir Flying Channel
    www.alphasuite.com

  3. #3

    Join Date
    Oct 2011
    Location
    WA
    Posts
    1,205
    Quote Originally Posted by TansAir View Post
    ... FYI: I am using ER70S-2 filler when I TIG the 4130 tubes, maybe there is compatible steel I can join with same filler, and that might open the door to other available already made parts (the bushings and maybe fender washers) that can be used for this? So that makes another question, are those small assemblies commonly made from "other than chrome moly"? Thanks!! Kevin
    Yes, common washers are used. Thicker is better for welding. Don't use or weld galvanized washers.
    Last edited by Bill Berson; 08-08-2018 at 03:13 PM.

  4. #4
    TansAir's Avatar
    Join Date
    Feb 2012
    Location
    Arlingon Heights, IL
    Posts
    11
    Quote Originally Posted by Bill Berson View Post
    Yes, common washers are used. Thicker is better for welding. Don't use or weld galvanized washers.
    Thanks Bill!! Definitely no galvanized welding here, I think after first attempt we never forget what happens when trying, it's like welding without shield gas (a spattery mess) and dissimilar metals not good either. I stuck with the 4130
    Kevin Tansor
    Arlington Heights, IL
    Private Pilot, ASEL.
    Alon A2 Aircoupe, C90
    Air Command CLT, EA81.
    PRA Chapter 18, KIGQ.
    Latest Vid's - The Screamin' Ostrich Gyroplane:
    YouTube - TansAir Flying Channel
    www.alphasuite.com

  5. #5
    TansAir's Avatar
    Join Date
    Feb 2012
    Location
    Arlingon Heights, IL
    Posts
    11
    All done, and Thanks all for the helpful comments and suggestions!!


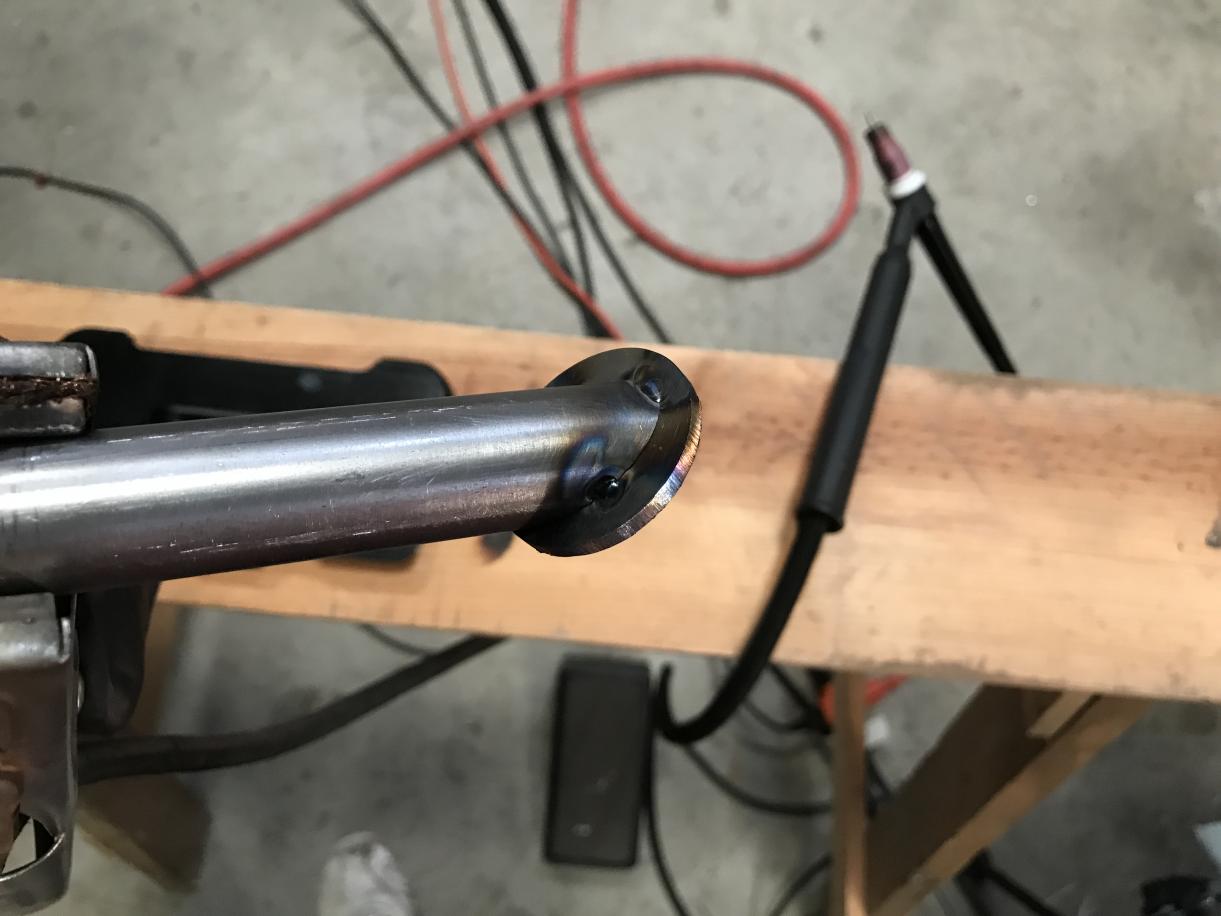
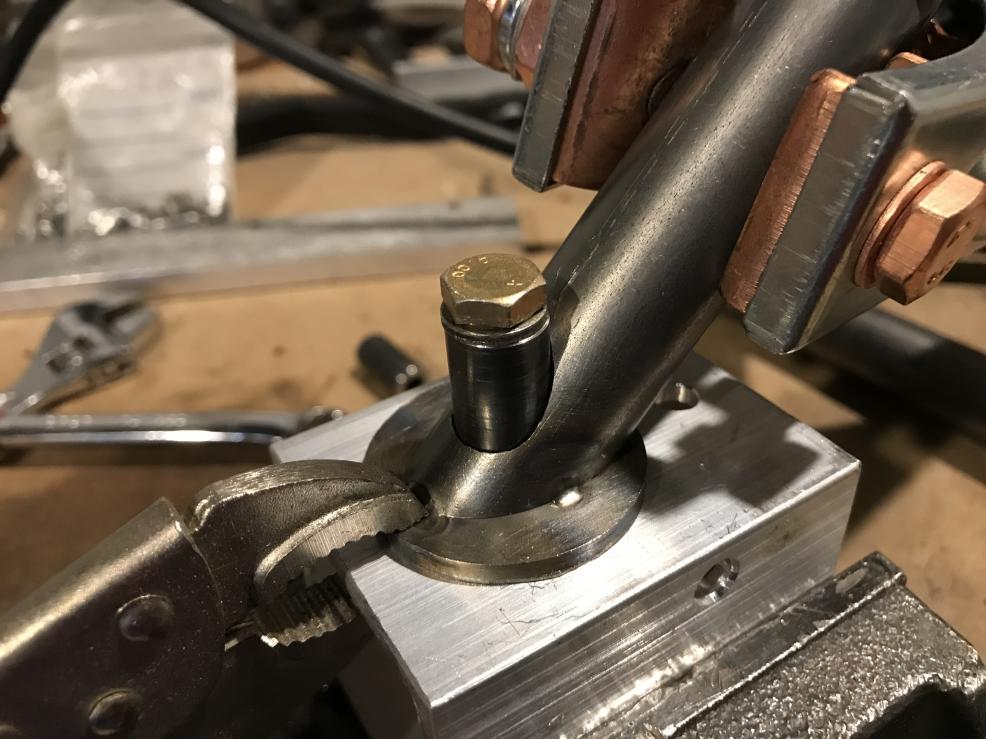
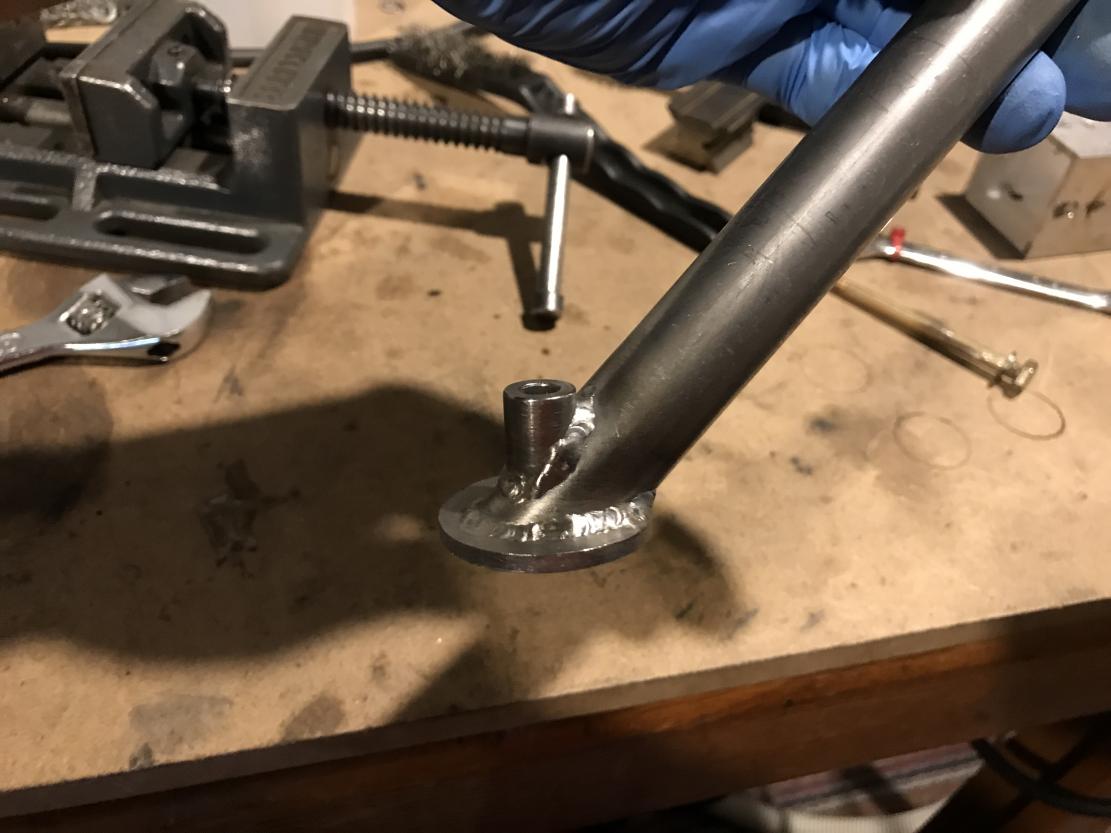
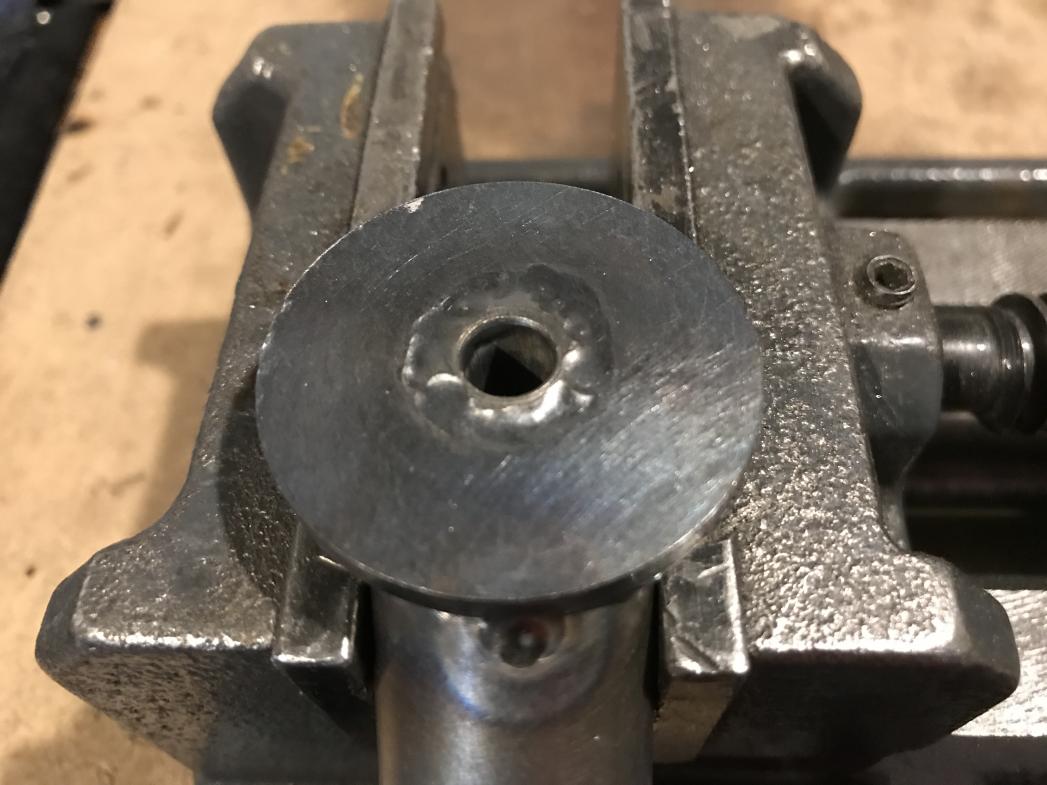
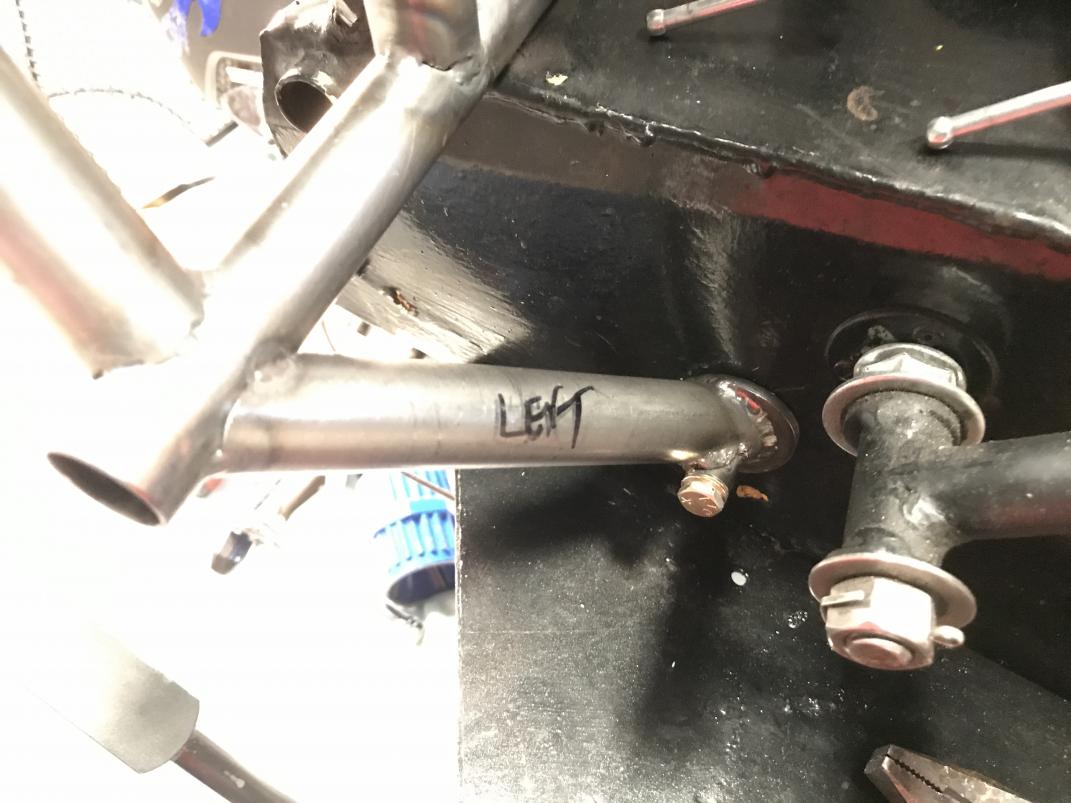
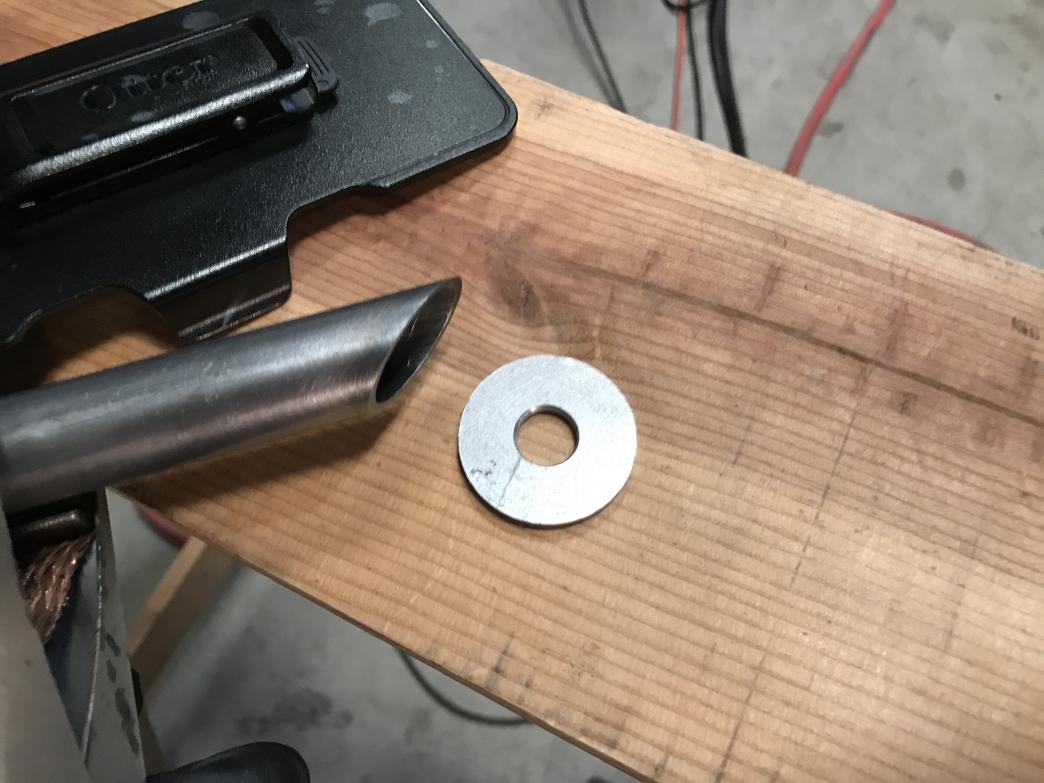
    I used the 4130 sheet to make the "washer". It was overkill with the .125" thickness, I should have just used .065" and it would have been fine, eh well.

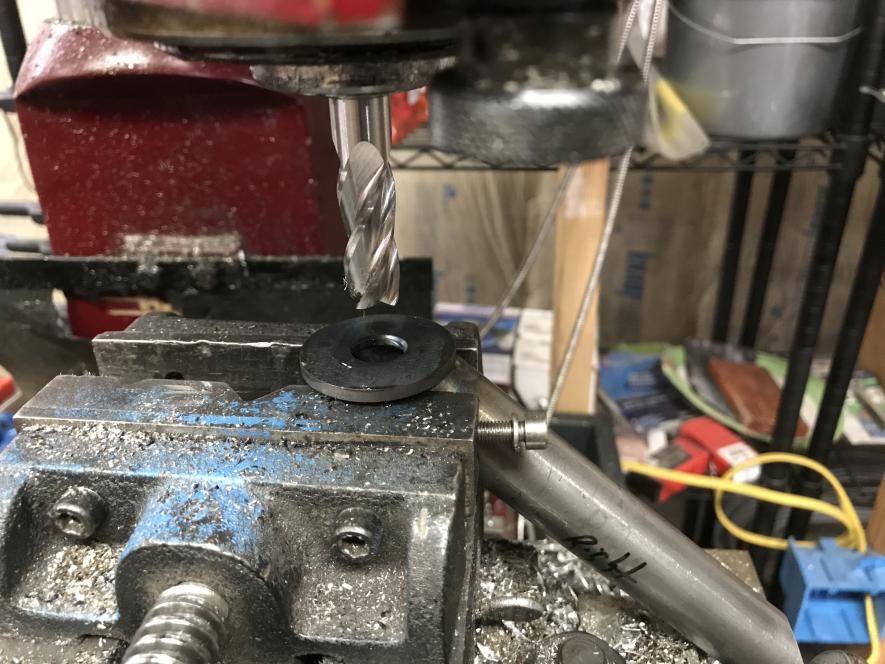
    McMaster had nice hole saw, I went over size a little so that the resulting inner disk that drops out when done was closer to the 1.5" OD I wanted. The pilot drill was of course smaller that the 1/2" ID hole I needed, but easy to drill that out afterwards.

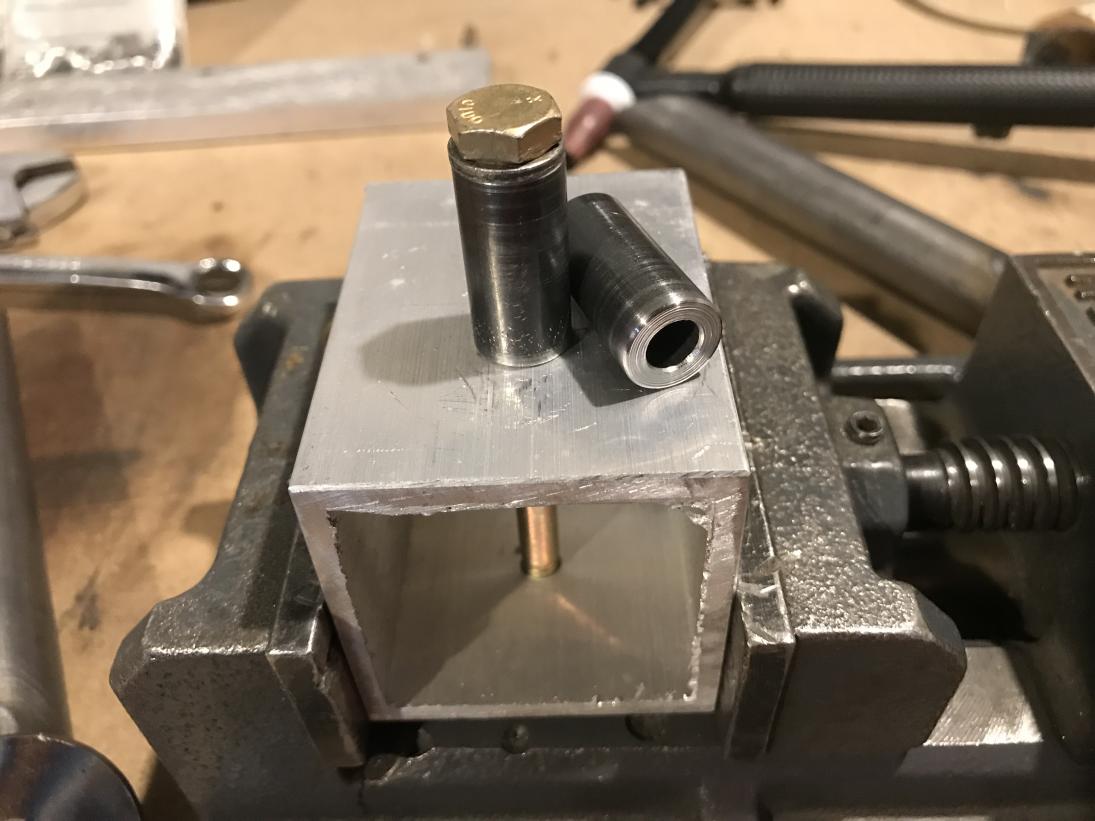
    I found the 4310 tube from ACS, .5"OD x .120 wall, .26" ID.

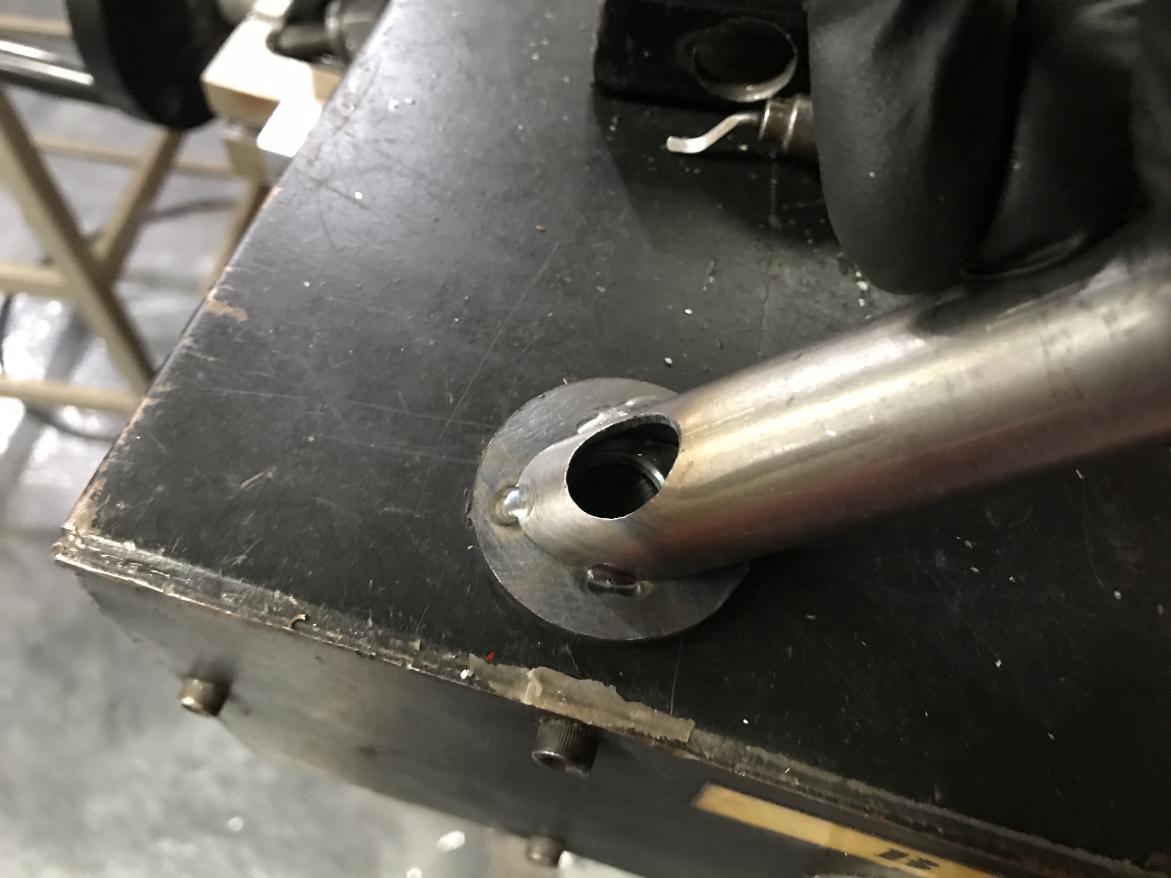
    Thanks to my trusty old Harbor Freight mill I was able to easily back drill (mill) thru the washer (after alignment by hand, with drill/mill not running). This made perfect fit for the 1/2" 4130 bushing.

    I made quick holding fixture from scrap 2x2 alum channel, then tack welded first, final welding later.

    Welding was done on my little HTP america TIG invertig welder (I love that little work horse). I used 100% argon shielding gas, and filler rod was ER70S-2.


    Enjoy the pics, maybe others can benefit so I share .. Thanks again guys!! Kevin
    Name:  P01.jpg
Views: 2130
Size:  87.4 KB
    Name:  P02.jpg
Views: 2084
Size:  89.0 KB
    Name:  P03.jpg
Views: 2082
Size:  80.1 KB
    Name:  P04.jpg
Views: 2027
Size:  94.6 KB
    Name:  P05.jpg
Views: 2075
Size:  82.5 KB
    Name:  P06.jpg
Views: 2107
Size:  85.2 KB
    Name:  P07.jpg
Views: 2132
Size:  91.0 KB
    Name:  P08.jpg
Views: 2228
Size:  82.6 KB
    Name:  P09.jpg
Views: 2082
Size:  87.8 KB
    Name:  P10.jpg
Views: 2094
Size:  88.3 KB
    Kevin Tansor
    Arlington Heights, IL
    Private Pilot, ASEL.
    Alon A2 Aircoupe, C90
    Air Command CLT, EA81.
    PRA Chapter 18, KIGQ.
    Latest Vid's - The Screamin' Ostrich Gyroplane:
    YouTube - TansAir Flying Channel
    www.alphasuite.com

  6. #6

    Join Date
    Dec 2016
    Location
    Zionsville, Indiana
    Posts
    40
    I find you approach to this problem interesting. I did the same type mounting but I started with the tube and the washer welded together. After welding the tube and washer, I trued the mounting surface of mount on the lathe. I think it is important to have the matting surface as flat as possible on the finished product.

    Your approach makes a very nice looking part.

  7. #7
    Aaron Novak's Avatar
    Join Date
    Aug 2011
    Location
    Oshkosh, Wi
    Posts
    361
    Quote Originally Posted by TansAir View Post
    All done, and Thanks all for the helpful comments and suggestions!!


    I used the 4130 sheet to make the "washer". It was overkill with the .125" thickness, I should have just used .065" and it would have been fine, eh well.

    McMaster had nice hole saw, I went over size a little so that the resulting inner disk that drops out when done was closer to the 1.5" OD I wanted. The pilot drill was of course smaller that the 1/2" ID hole I needed, but easy to drill that out afterwards.

    I found the 4310 tube from ACS, .5"OD x .120 wall, .26" ID.

    Thanks to my trusty old Harbor Freight mill I was able to easily back drill (mill) thru the washer (after alignment by hand, with drill/mill not running). This made perfect fit for the 1/2" 4130 bushing.

    I made quick holding fixture from scrap 2x2 alum channel, then tack welded first, final welding later.

    Welding was done on my little HTP america TIG invertig welder (I love that little work horse). I used 100% argon shielding gas, and filler rod was ER70S-2.


    Enjoy the pics, maybe others can benefit so I share .. Thanks again guys!! Kevin
    Name:  P01.jpg
Views: 2130
Size:  87.4 KB
    Name:  P02.jpg
Views: 2084
Size:  89.0 KB
    Name:  P03.jpg
Views: 2082
Size:  80.1 KB
    Name:  P04.jpg
Views: 2027
Size:  94.6 KB
    Name:  P05.jpg
Views: 2075
Size:  82.5 KB
    Name:  P06.jpg
Views: 2107
Size:  85.2 KB
    Name:  P07.jpg
Views: 2132
Size:  91.0 KB
    Name:  P08.jpg
Views: 2228
Size:  82.6 KB
    Name:  P09.jpg
Views: 2082
Size:  87.8 KB
    Name:  P10.jpg
Views: 2094
Size:  88.3 KB
    Ok, I was trying to figure out a positive way to say this, but instead I am just going to be blunt. That welding job scares me. The penetration is non-existent, the welds are not complete, and the heat input seems really erratic. The toes of some of those globs just are horrid. It looks like you were using away too little heat input. I would really really suggest you do some more practice, have you work inspected by someone competent and then re-do those parts. The design is good, however the execution I would not pass. Please realize I am saying this not to be mean, but instead as someone concerned for your safety. I would love to help you improve your welding skills if you need some pointers etc.

  8. #8

    Join Date
    Jul 2011
    Location
    Clarklake, MI
    Posts
    2,461
    I have made some of those before!! .....std tubing for the tube part. For example, 1/2" cm tubing has at least 8 std wall thicknesses from .028" to 1/8". Try shopping at one of the aircraft suppliers for more variety.

    For the "washer" part, rough cut out of plate, drill hole, stack up on arbor, put arbor in lathe, turn OD to size, bazinga! Done.

  9. #9
    TansAir's Avatar
    Join Date
    Feb 2012
    Location
    Arlingon Heights, IL
    Posts
    11
    Quote Originally Posted by martymayes View Post
    I have made some of those before!! .....std tubing for the tube part. For example, 1/2" cm tubing has at least 8 std wall thicknesses from .028" to 1/8". Try shopping at one of the aircraft suppliers for more variety.

    For the "washer" part, rough cut out of plate, drill hole, stack up on arbor, put arbor in lathe, turn OD to size, bazinga! Done.
    Awesome!! I like the idea of "stacking" the rough pieces and doing them all on lathe at once, that would save time, NICE!! Thanks!!
    Kevin Tansor
    Arlington Heights, IL
    Private Pilot, ASEL.
    Alon A2 Aircoupe, C90
    Air Command CLT, EA81.
    PRA Chapter 18, KIGQ.
    Latest Vid's - The Screamin' Ostrich Gyroplane:
    YouTube - TansAir Flying Channel
    www.alphasuite.com

  10. #10

    Join Date
    May 2012
    Location
    Ashland, MO
    Posts
    7
    I cut the small round circles using 4130 1/8" thick using a good hole saw on a drill press.
    You can get 4130 tube in all sorts of wall thickness from Aircraft Spruce (and others). Weld them together and you are ready go
    ...Paul

Tags for this Thread

Posting Permissions

  • You may not post new threads
  • You may not post replies
  • You may not post attachments
  • You may not edit your posts
  •